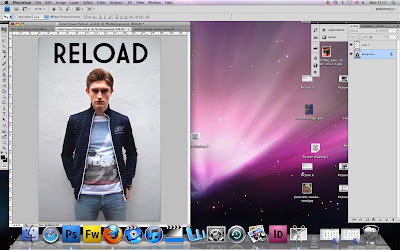
 As you can see now the title is inserted above my models head.
The title is simple at the moment but later on I will be adding colour and some effects to make it stand out more and seem more interesting to customers. I wanted the font to be positioned above the models head as this is what most of the magazines do, which I found out when researching into the music magazine market.

The title was inserted into a new page and all I had to do was to click on the title and drag it into my other page where I already had my model. I had to hold it down onto the other page for a few seconds before it transferred into the other page. Once is transferred I kept holding down on the mouse and dragged it into the position I wanted it to be placed.
After I had finished editing my model, I decided to insert my title that I got from the website www.dafont.com where you can type in the name of your title and choose the font you want. I went for a simple but bold font which is what Vibe and RWD magazine have on their front page as I found out in my research. To open the title I had already saved it so all I had to do was go to File -----> Open then search for my font, click on it and press open.

This screen grab is after I had finished using the spot healing brush and as you can see the two images are different if you look closely you can see there are no imperfections on my models face or neck.


Continuing on from my last development of editing my front cover I now
wanted to clear up any imperfections on my models face such as spots,
blemishes or uneven areas. To do this I used the spot healing tool
(above) selected on the tool bar on the left. I made the tool size 15 which is
relatively small and patched up any spots or imperfections I could see
on his face
FRONT COVER CONSTRUCTION 2

No comments:
Post a Comment